Connecting Walls To Floors In Revit

Wall Floor Connection In Revit Tutorial Youtube

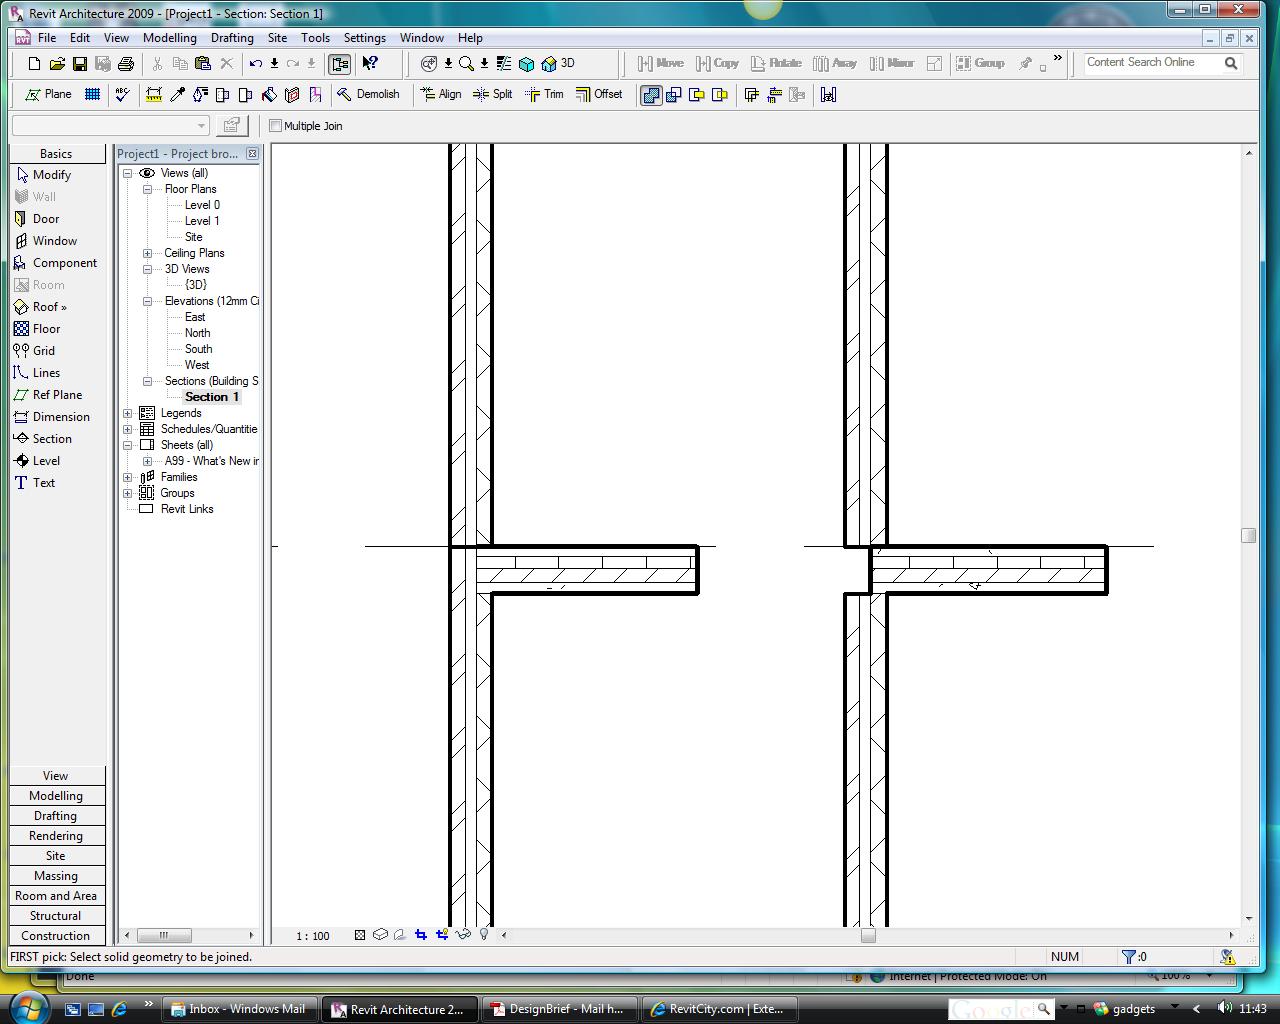
How To Connect Walls And Floors In This Situation Autodesk Community Revit Products

Solved Joining Walls Floors Priority Of Structural Layers Autodesk Community Revit Products

To Join Automatically Floor And Walls Autodesk Community Revit Products
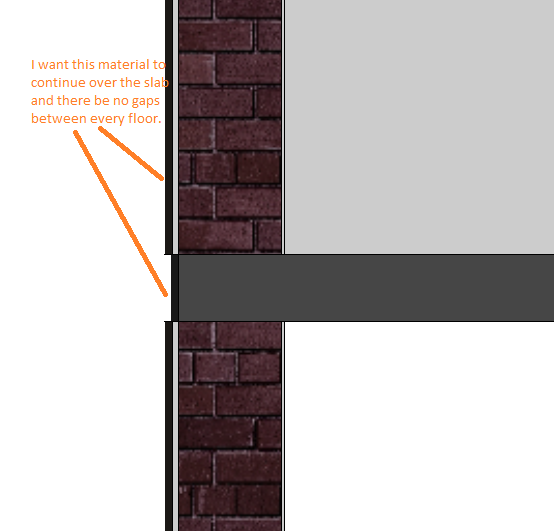
Revitcity Com Floor And Wall Joining And Finish Material

Joining Walls To Structural Layer Of Floor Autodesk Community Revit Products

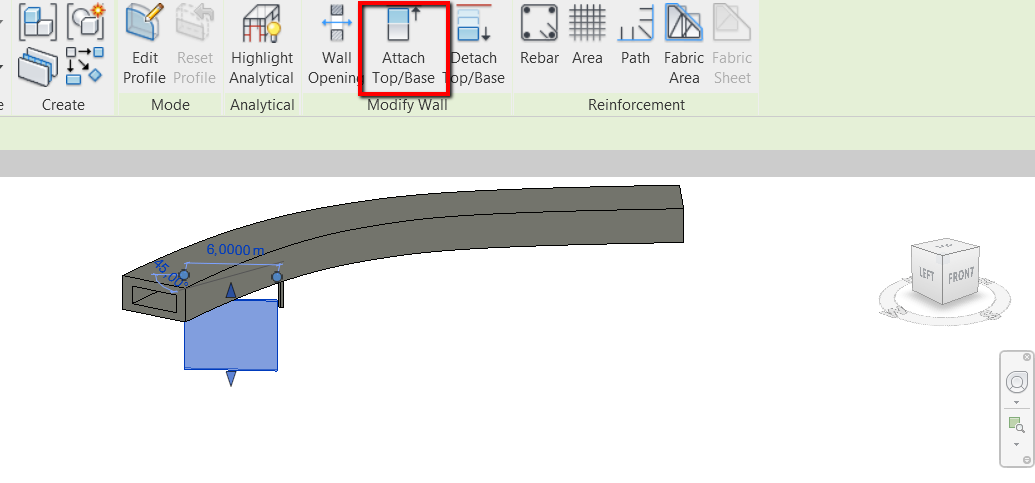
Hey guys i have a curved ramp that goes from one level to another.
Connecting walls to floors in revit. Inserting a new layer allows you to stack one wall on top of the other. One wall will assume the variable height parameter which reports the. So your meshed etabs model can be translated into a proper and clean model in revit or any other konstru supported platform. The wall joins tool is not recommended for editing wall joins that involve more than 4 walls span multiple floors or exist in more than one workset.
Stack the two wall types together. Thanks johns answer no question is a stupid question. 3 adjust wall join display in view properties. We implemented this workflow as close as possible to our users existing workflows so we are joining walls and floors by groups and across levels.
The other element can be a floor a roof a ceiling a reference plane or another wall that is directly above or below. The third and final technique to control the wall joins is to use wall join display in the instance properties of the view. Disallow wall joins by default revit creates a join where 2 walls intersect. Konstru supports joining etabs walls and floors into single elements.
Open the revit project browser to view the wall types you just created. You can only modify this setting if the detail level of the view is coarse this technique is useful if you have a lot of walls removing the tedious process of manually adjusting the join and boundary of each individual wall. Especially when it comes to building a shed. By attaching a wall to another element you avoid the need to manually edit the wall profile when the design changes.
Typically a shed wall is nailed to the floor with 16d common nails. How do i connect the walls to the floor. However you can. Sorry if this seems like a stupid question but i can t seem to get into my head how i join the two.
After placing a wall you can override its initial top and base constraints by attaching its top or base to another element in the same vertical plane. For these more complex joins use the following basic procedure to edit individual walls as needed. I need to create the concrete walls that support the ramp on the bottom so that they trim at the bottom of the ramp. Navigate to the stacked wall families section then edit the family that already exists.
Revitcity Com Extend Floor Into Wall Core Getting Clean Up Correct Pic Attached

Solved Revil Walls Not Connecting To Floor Autodesk Community Revit Products

How To Control Revit Host Layers To Show A Floor And Wall Section Lineweight Correctly Micrographics

About Automatically Attaching Walls To Floors Revit Products 2016 Autodesk Knowledge Network

Auto Joining Floors And Walls Lubim

Solved Cannot Extend Layer S Of The Highlighted Vertically Compound Wall Autodesk Community Revit Products
Cannot Attach Walls To Indicated In Place Floor In Revit Revit Products 2019 Autodesk Knowledge Network
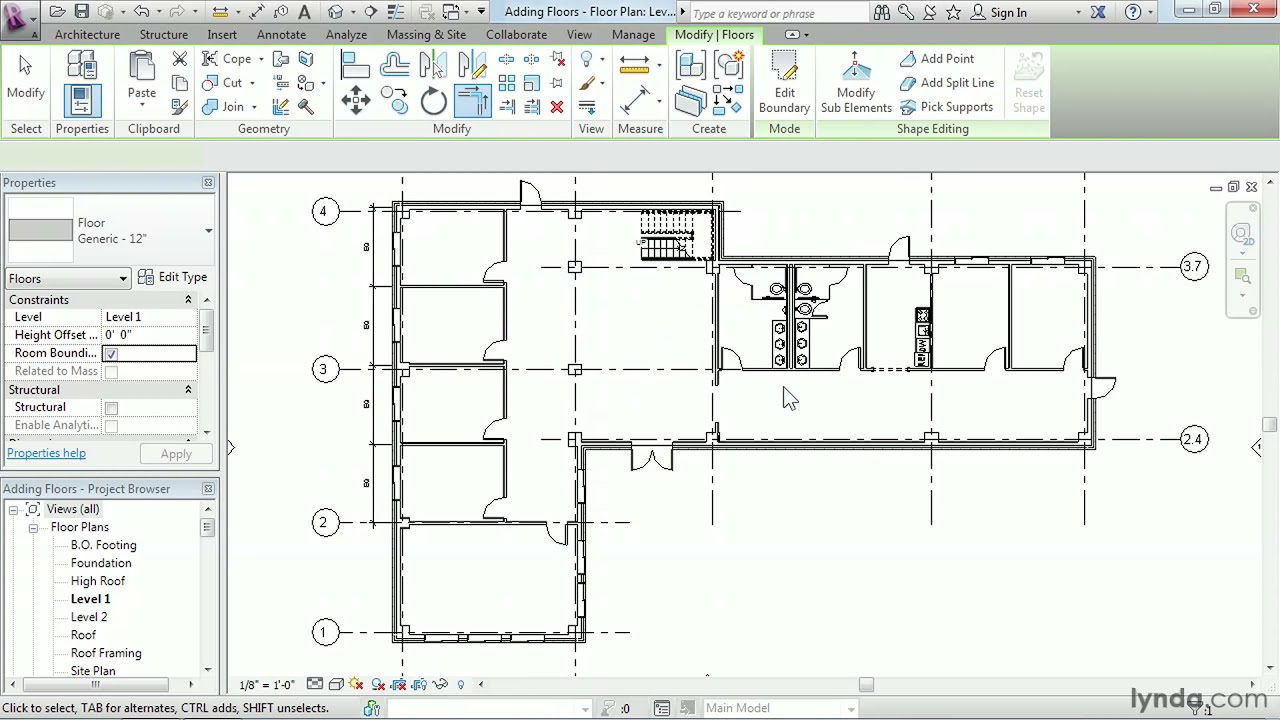
Revit Architecture How To Work With Floors Lynda Com Tutorial Youtube

Revit Tips A Stair Family That Can Be Joined With Walls And Floors Youtube

Floor And Wall Finish Won T Join Autodesk Community Revit Products

Solved Interlocking Floor And Wall Layers At Junction Autodesk Community Revit Products

Stop Asking To Attach Walls Autodesk Community

Solved Attach Wall To The Floor Problem Autodesk Community Revit Products

